DIY Off-Grid Solar Primer
Build autonomy, a safety net and community support with your own solar power.
Building solar systems is hard because it encompasses a lot of different skills and understanding. For the DIY builder, hacker, tinkerer, or general weirdo the biggest obstacle is the lack of information on how to really build these systems. In my opinion, this is because companies that sell solar don’t want the average person building their own systems. That’s why you will be hard-pressed to find a solar company that will build you a fully off-grid system and even then we are talking about systems that cost between 5k-15k to install. I will say anyone with even minor experience with this stuff can build one of these systems (or just buy one if you have the money).
Why would I want an Off-Grid solar system?
I live in Texas and in 2021 the power grid almost completely failed due to a large winter storm. The private company that runs the grid did nothing to prepare when it comes to weatherization despite constant warnings from climate scientists about freak storms like this. Thousands of people died. Full stop. Because the power was out and Texas homes are not insulated thousands of people froze to death or died from carbon monoxide poisoning trying to heat their homes. Let alone the impact to crops, animals, and livestock. This was something I never thought I would see in reality and it happened. With the climate changing, there will be even worse storms and events on the horizon.
Off grid solar can give you autonomy from power companies and the failings of corporate interest and greed. But these systems don’t have to be just for you. Imagine the power grid goes down, people pool their resources together to offer power from generators and solar to help other people survive too.
So with something like this you are able to decouple yourself from a power company, be able to power important infrastructure for you and your community and also save money on your electrical bill. I run an indoor hydroponic farm that runs totally off solar. So even in the dead of winter, without power I can grow crops. This is the resiliency we all need if we want to survive climate change.
Buying a premade system vs DIY
If you don’t feel comfortable working with electricy, don’t have any tools or time, or space to work on stuff you can buy premade kits that will do the job. The issue with premade kits are the price. This “solar generator” from Jackery (kinda the standard when it comes to off grid solar life) costs $1,500!
This is a plug-and-play system, so you are set to go but this is pretty expensive. But building a system like this is not extremely hard when you know the ingredients and you can scale the system up and down depending on your needs.
A DIY system would cost around $900. But DIY would have double the amount of solar charging (200 watts), 200 more watts per hour, and can be used as a portable system or permanent / stand-alone setup.
Cheaper, more powerful and modular so you can scale things up or down. All it takes is some basic tools, a little safety knowledge and to know the ingredients to put it all together. A DIY system means more interoperability because there isn’t one point of failure like a Jackery. Say the electrical ports get fried while you are out in the field or during an emergency, can you quickly fix proprietary components? Can you even order that specific part you need, let alone in a massive weather event? Proprietary and closed systems are convenient until they aren’t. With a DIY system there is more work to do, but if something breaks you can more than likely fix it because they are pretty common parts, or scrap or scavenge any part from any other system and make it work. If a port on your inverter in a DIY system fails, you could scrap an inverter used in an old car or boat and it would more than likely work. It gives you more options and gives you more times to use recycled goods, or repurpose stuff to get the job done. What’s more solarpunk than scavenging an old inverter from a car to run a handbuilt solar array?
DIY Solar Power Basics
There are some core components to any solar power system. At the core you only have a couple of items running the system. This is for building a totally standalone, off grid system.
Solar Panels
Charge Controller
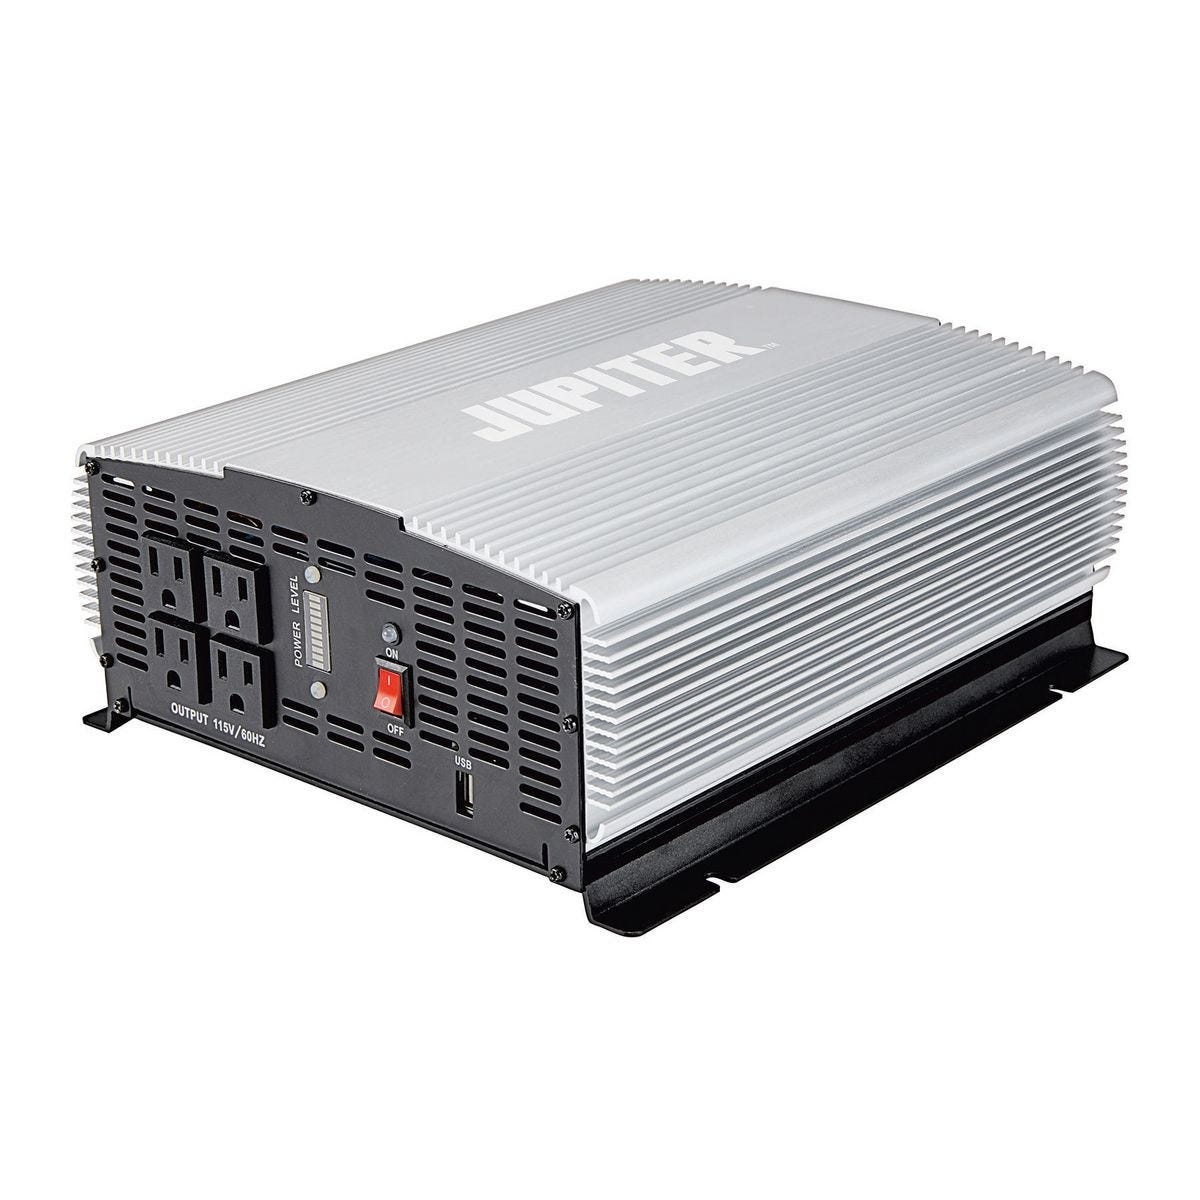
Inverter
Battery storage
That is basically it.
Obviously, there are more details into how they work and operate together but that is pretty much it. Anyone who tries to make this confusing is running a grift. Solar systems are simple at the general level. They get complex when talking about electrical efficiency and nerdy shit but you can find tons of info into that if you are interested.
BIG DISCLAIMER GOING ON!
Disclaimer: None of this stuff is chosen because it’s the absolute best or because they are specific. It needs to be reliable and work. Fuck brands, and fuck the propaganda that everything from China is complete trash. Also, do this stuff at your own risk and follow basic safety measures when working with even low voltages of electricity.
Remember never to cross positive and negative wires, wear gloves when handling wires, never handle equipment plugged in live to a system and always double check your connections and surroundings!
I am being very serious here, if you don’t feel comfortable handling potentially high amperage, simply don’t do this and buy a pre-built system. 30 Milliamps can stun you and make your muscles seize up, 30 Amps can fucking kill you, working with this stuff can be no joke if you are fucking around. There are some basic stuff you can do to minimize your risk. When working with PV panels never work with them live. Meaning don’t plug your panels in until your system is ready to get that power. Don’t plug wires into PV panels because they will constantly generate electricity in the sun. Always work backward from your power source so add your wires into the charge controller, then you can connect them to the PV panels when everything else is ready. Always double check your connections and if you are working with any exposed wires always check the power source is disconnected. Never get brazen and think “Oh I’m an electrical engineer, or a contractor or something like that, I don’t need to do this I know what I am doing”. The second you say stuff like that is when you get hurt.
Solar Panels
I won’t go into how solar panels work and spare you of the science. If you really want to know all the details there are electrical engineers that spend years in school and are professors that can explain how and why photovoltaics work.
There are a couple of different types of solar panels but there are 2 main ones: Monocrystalline and Polycrystalline. Monocrystalline is more heat resistant and conducts better but is also more expensive than Polycrystalline. Think of Polycrystalline when you see solar yard lights or a solar panel on a calculator. They are small and tend to be for very low voltage applications. Monocrystalline is what you are looking for.
Voltage
Stick with 12 volts. Most solar stuff runs off 12 volts and I would not recommend messing with 24 volts unless you have the expertise to work with higher voltages. 12 volt is like owning a firearm that uses 5.56 ammo, it is abundant (well used to be), easier to work with and in an emergency is super useful. Most solar stuff is made for 12 volts, some stuff can handle 24 but don’t push your luck especially if you are scrapping stuff for extra parts or something.
Watts
I recommend 100-watt solar panels for a DIY install. I do not recommend mounting them to your roof for a bunch of reasons. A small system is best when it is semi-nimble and can be moved and maintained without needing to climb. 100-watt panels are cheap, and also will charge even a pretty sizeable battery bank pretty quickly. A good start is two 100 watt panels. The good thing is it’s easy to expand so if you want to start small and keep costs down, just get two and if you want more power, maybe go to four panels for a total of 400 Watts. In terms of brands? To me, it really doesn’t make a gigantic difference. I have seen Coleman, Renogy, HQST, Sunpower, LG panels and they generally are all the same besides build quality. A PV panel with an aluminum frame. Some may have a thicker glass or heavier aluminum but that is up to you if that is an issue. Because this is an off grid semi portable system, if you have to deal with hail or something you can bring them inside to protect them or cover them since they won’t be mounted to your roof.
While looking at this you might be asking
“Ok fine 100 Watts seems a little low though, I see 250 watt panels all the time on Craigslist, why not get those?”
The panels are not really the most expensive part of the system. It is the charge controller and batteries. If you decide to get higher wattage panels or start adding a really big amount of panels, the more expensive the charge controller will be. Watts are one thing, but when it comes to solar panels Amperage is the big number to watch when it comes to affordability and not needing a $2,000 charge controller.
That goes into the next part
Amps
With solar panels, there are 2 measurements of electricity involved. Watts and Amps. Every panel will have a sticker or plaque that says the watts and amps. To calculate the maximum amperage load you divide your watts by voltage. So with a 100 watt solar panel operating at 12 volts, each panel will produce about 8 amps. That is at maximum power, and you almost never will see the full power from solar panels. But you want to make sure your charge controller can handle the amperage load. So in the case of running 400 Watt panels your charge controller needs to be able to handle 30 Amps.
This gets confusing pretty fast so I would recommend keeping the system super simple and maxing things out at four 100 watt/12 volt panels in parallel. You can go bigger but honestly, I would keep it there unless you have a massive battery bank. 400 Watts of solar will charge most small scale battery banks. Again, this system is not for powering your entire house, you don’t need 9 Kilowatts to run lights, charge phones and run routers and heaters. If you do want more power, you will trade that off with requiring bigger and more expensive charge controllers. So there is a balance. You could also have multiple small scale systems powering different stuff around the house but that is up to you to explore!
Charge Controllers
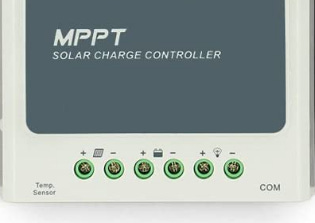
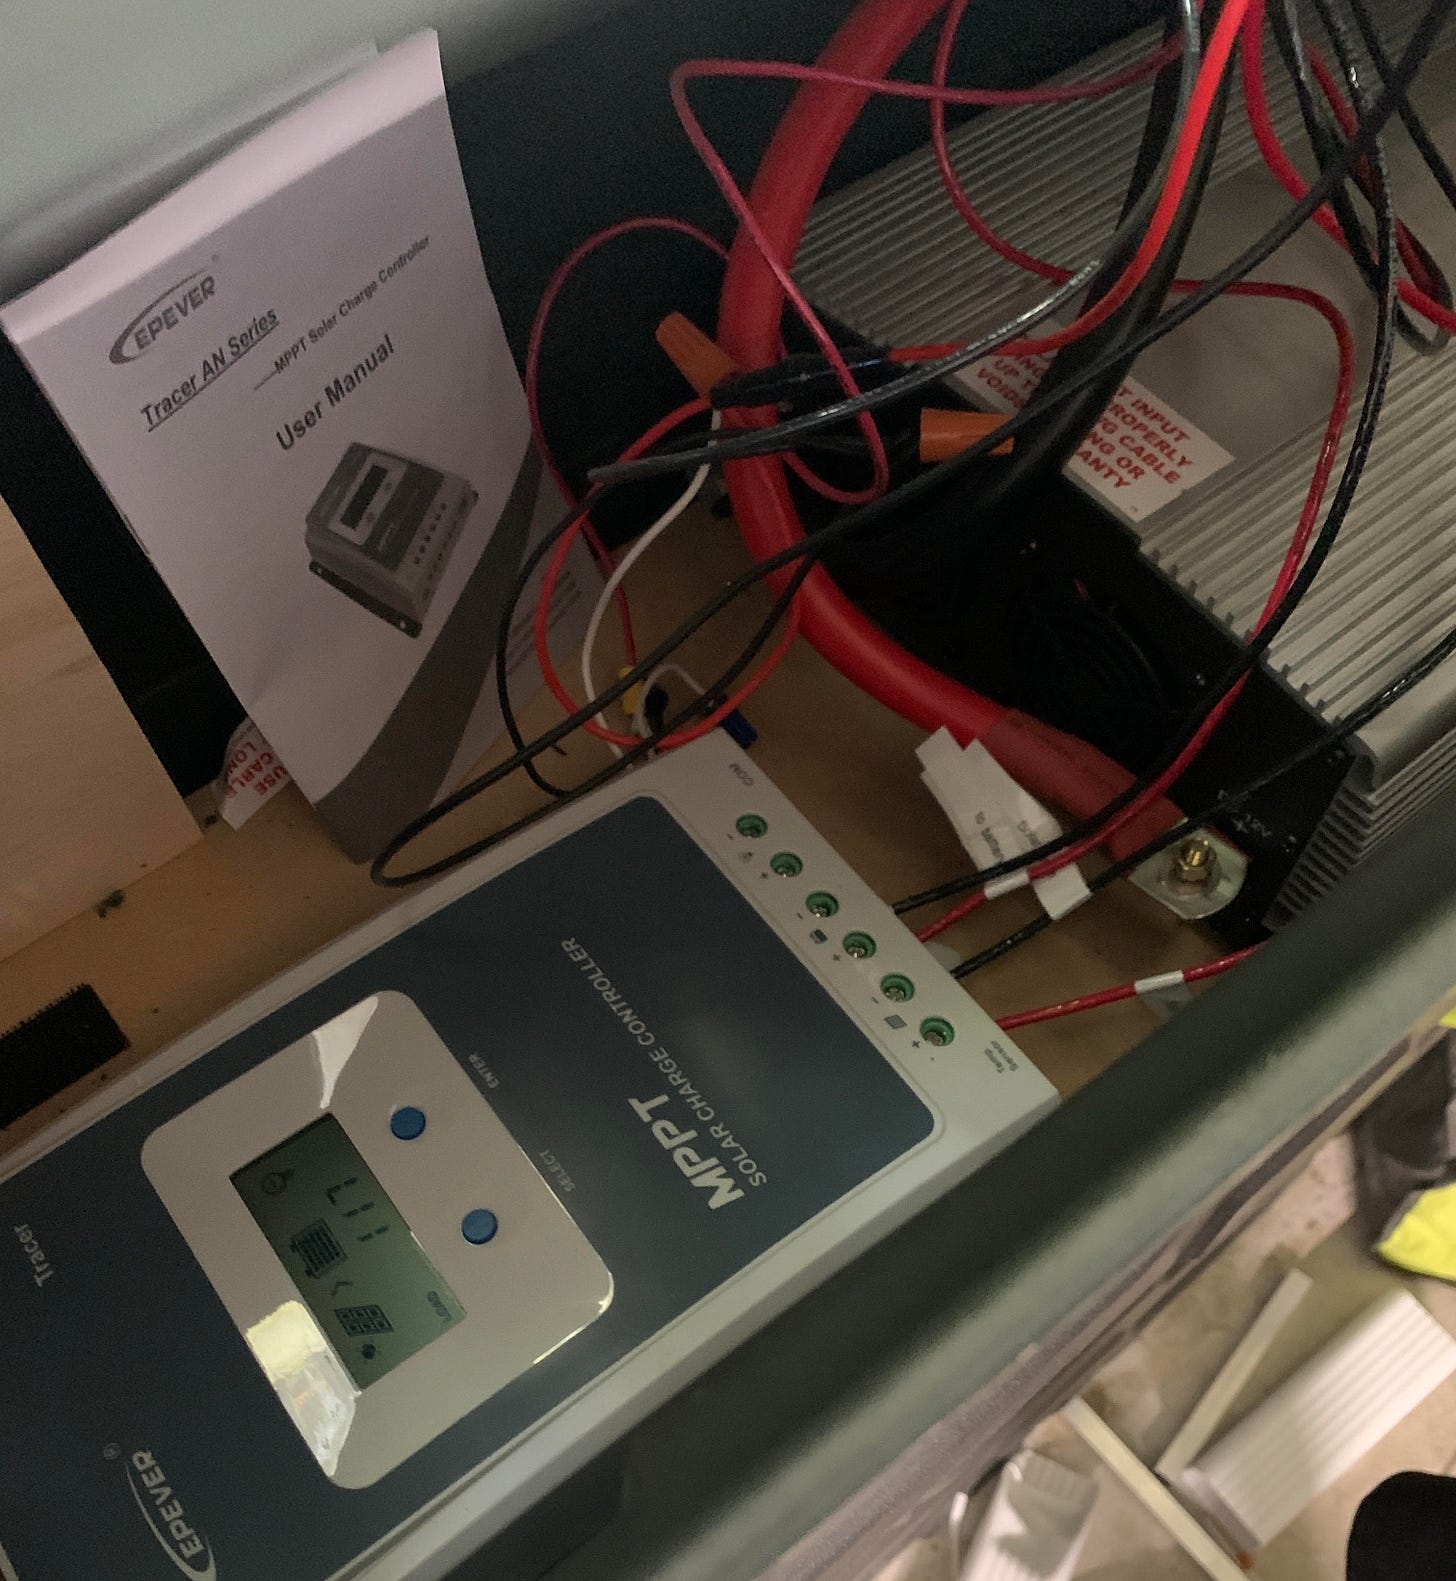
Charge controllers are the brains of the operation and basically determine when and how to charge batteries. This is a big failure point on solar installs. If your charge controller is under powered or meant for amps less than what you had, the controller can fail and cause battery problems, overload your system, or mess up your inverter. So it is best to get a charge controller that can handle more amperage than the maximum your panels can put out. This is the charge controller I use for my 400 Watt solar setup.
You can buy really expensive models that have Bluetooth and can do electrical use charting, alerts of voltage drops and cool metric gathering. But that is up to you to decide if those features make sense. For this application, you really just need a controller that won’t catch on fire (literally and metaphorically) and just regulate the batteries. After testing it in a garage in Texas summer, I never once had it overheat or any problems with the amperage of the panels and the amperage of this charge controller. Get an MPPT charge controller, they cost more than PWM charge controllers but are more efficient. You can look into the difference if you want but just go for MPPT charging.
Batteries
There are a lot of batteries out there but there are 4 major types that are used in solar installations.
Flooded Lead acid batteries
Sealed Lead acid batteries
AGM / RV batteries
Lithium-ion batteries
If you are a beginner or running a small scale solar generator stay away from Flooded lead acid batteries. They require maintenance periodically topping them off with water. These are great for big installations but again, require more upkeep and ends up being kinda annoying. That is my personal opinion. Plenty of people will fight me on that but I would rather get a Sealed Lead acid and never have to do upkeep than constantly worry about water levels.
Sealed Lead Acid Batteries
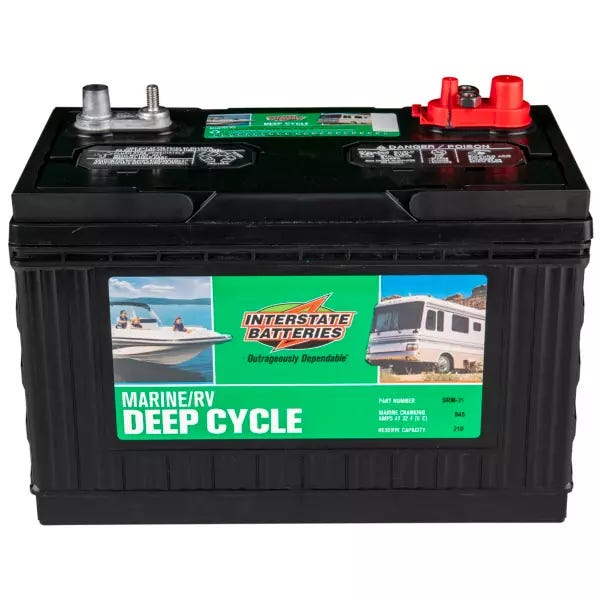
These require less upkeep than the flooded counterparts and are easier to find. This is a broad range of various different types of batteries. But for solar, you would be looking for “Deep Cycle” sealed batteries. These look like car batteries but are completely different. There are also Deep Cycle starting batteries but you just want normal “Deep Cycle” batteries. The nice thing is you can find these at automotive and marine stores pretty easily. There is a big downside to using these.
DISCLAIMER! Sealed Lead Acid batteries need to vent in emergencies, and the gases are toxic and potentially flammable. Never use them in very enclosed spaces like an RV, Van or anywhere that does not have good ventilation.
That is the big downside to these. They work great, are cost effective, and easy to find but in the event they fail, you can have serious issues. I had this happen early on when I only had one battery on my system and overloaded my inverter. It failed completely and caused the battery to essentially start boiling, causing gas to be released. It is in my garage with a vent fan directly over the batteries but I had to run in with PPE and shut everything down. It legit could have caught on fire or exploded and that is a big danger when working with batteries. Keep in mind it was because I had an underpowered inverter that was faulty and short circuited wrong. For the most part, solar systems are pretty safe to work with when using proper precautions but batteries are very dangerous. Keep in mind this is an extreme use case, but something to be very aware of. I am not trying to scare you from this, but keep in mind working with this stuff is not all sunshine and rainbows, things can go wrong and if they do you need to be prepared for them. This can also happen in prebuilt systems, so always just be aware that is a possibility.
AGM Batteries
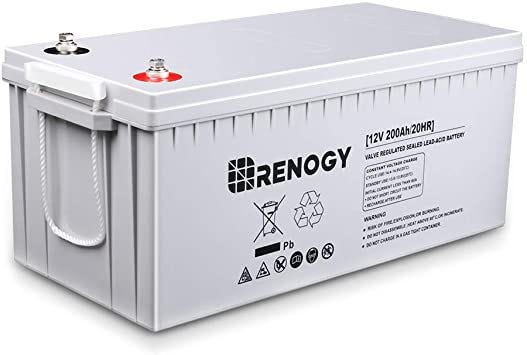
AGM batteries are like Sealed Lead Acid batteries but work in very different ways. You don’t need to really maintain them and they are sealed but they also don’t vent as much as Lead Acid. You still need to have a bit of ventilation but these are safer to have in an RV, home or tent. Again these are batteries so they aren’t 100% accident-proof but are a better step if you live in an apartment and are planning on doing a system like this or don’t have access to a big ventilated area like a garage or something. The biggest downside is they are hard to find and you will either be spending a lot of money on it at your local specialty battery store or waiting on getting them shipped to your home. They work great, but they cost a lot compared to other batteries. But that trade off comes for added safety and honestly I would pick these over Sealed Lead Acid Deep Cycle batteries. You can scrap these from broken electronic wheelchairs and some golf carts.
Lithium-ion batteries
These are the latest batteries and the most expensive. They have superior charge capabilities over the other ones and can last longer without the need to vent in a lot of cases. The downside is cost. These batteries are ridiculously expensive compared to the other ones. And most off-the-shelf charge controllers won’t handle these batteries well. These are great for higher end builds and for permanent whole house solar installs.
OK whatever, what battery type should I get?
Sealed AGM batteries if you are using it in an RV or in your home or apartment.
Lead Acid Deep Cycle if you cant find AGM batteries, have a vented area like a garage or outdoor shed and own a fire extinguisher in case of emergencies.
AGM batteries are more expensive per Watt compared to SLA batteries but for the added safety I would recommend them. In a pinch you can use any deep cycle battery and they might be good for kinda long term emergency storage but I personally wish I had AGM batteries in my setup at the moment. You can also find SLA batteries on boats and sometimes in cars with sound systems so if you are big on scrapping materials there are some opportunities for ya.
The number of batteries for your setup will depend on how much power you want to store and your planned usage. I say spend a decent amount of money on the battery bank. Because the more power you have stored, the more you can use on your inverter. This really depends on your use. Get started with like 2 batteries and scale up if that isn’t enough.
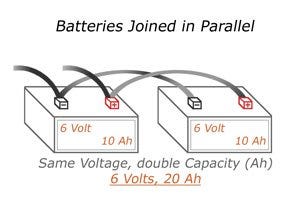
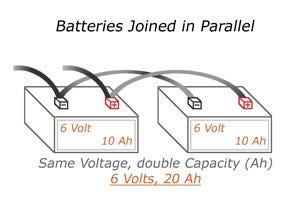
In order to gain more storage you set your batteries in parallel, so negative to negative, positive to positive. This will keep the voltage at 12 volts but just add more capacity and you can build from there.
In terms of the specific kinds of deep cycle batteries, look for ones with more storage hours. Crank hours aren’t really needed unless you plan on having super high spike voltage stuff attached to your system. Just get the batteries that have the biggest storage amp hours.
Inverters
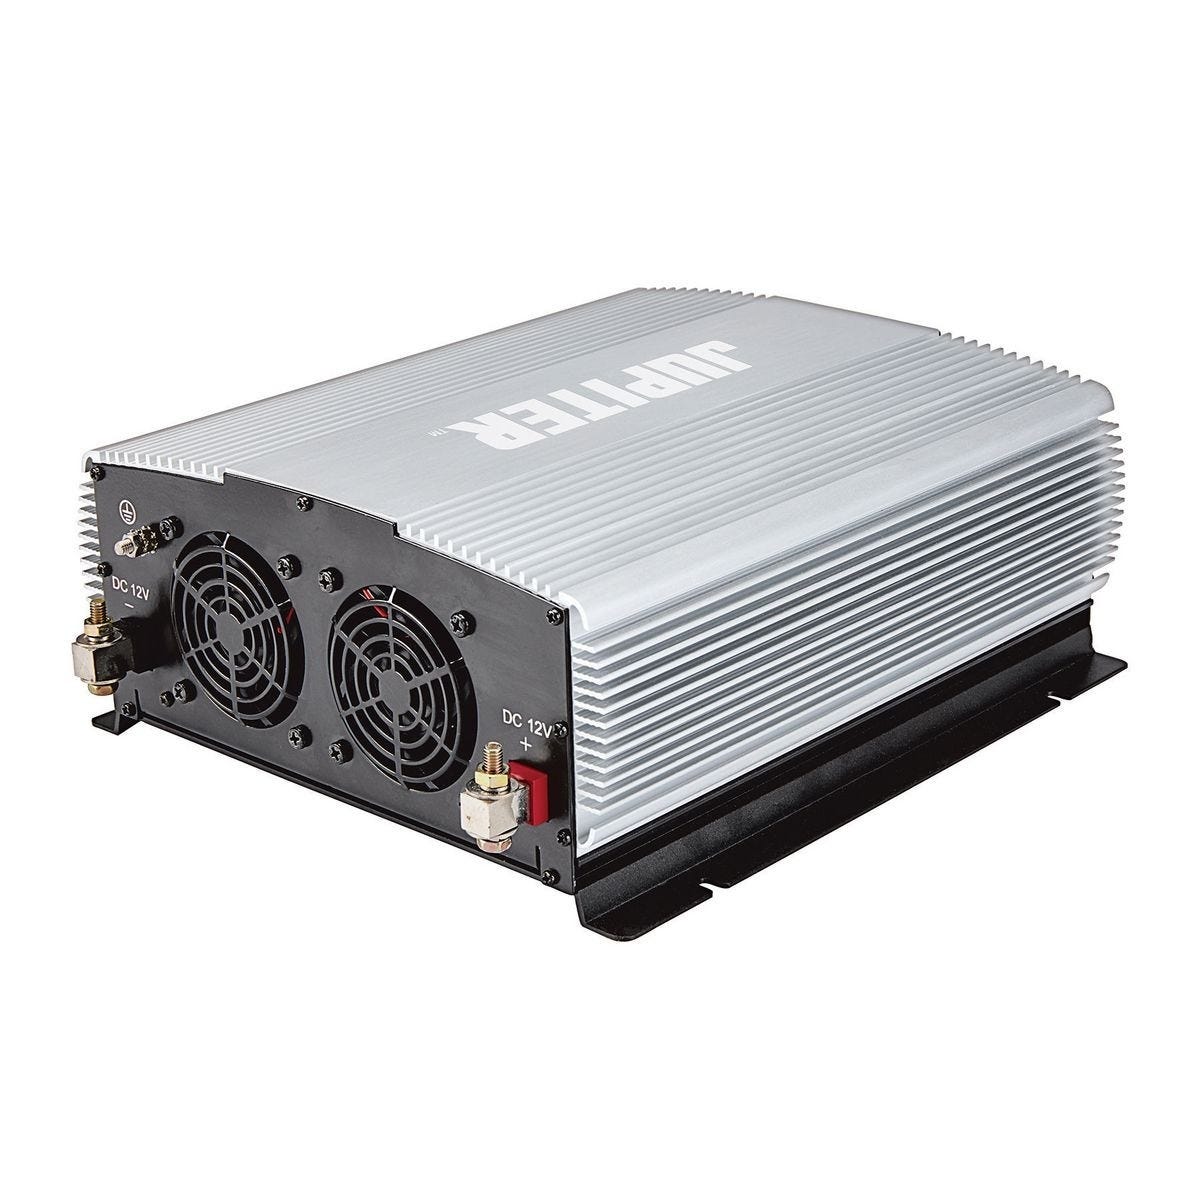
Solar panels make power in Direct Current or DC power. Mostly everything we use runs off Alternating Current or AC power. There are appliances and stuff that run just off DC and the reasoning why we use AC power is interesting but I will save that for later. So you need to transform the DC power coming from your solar panels, and coming from your batteries into AC power and that’s what an inverter does.
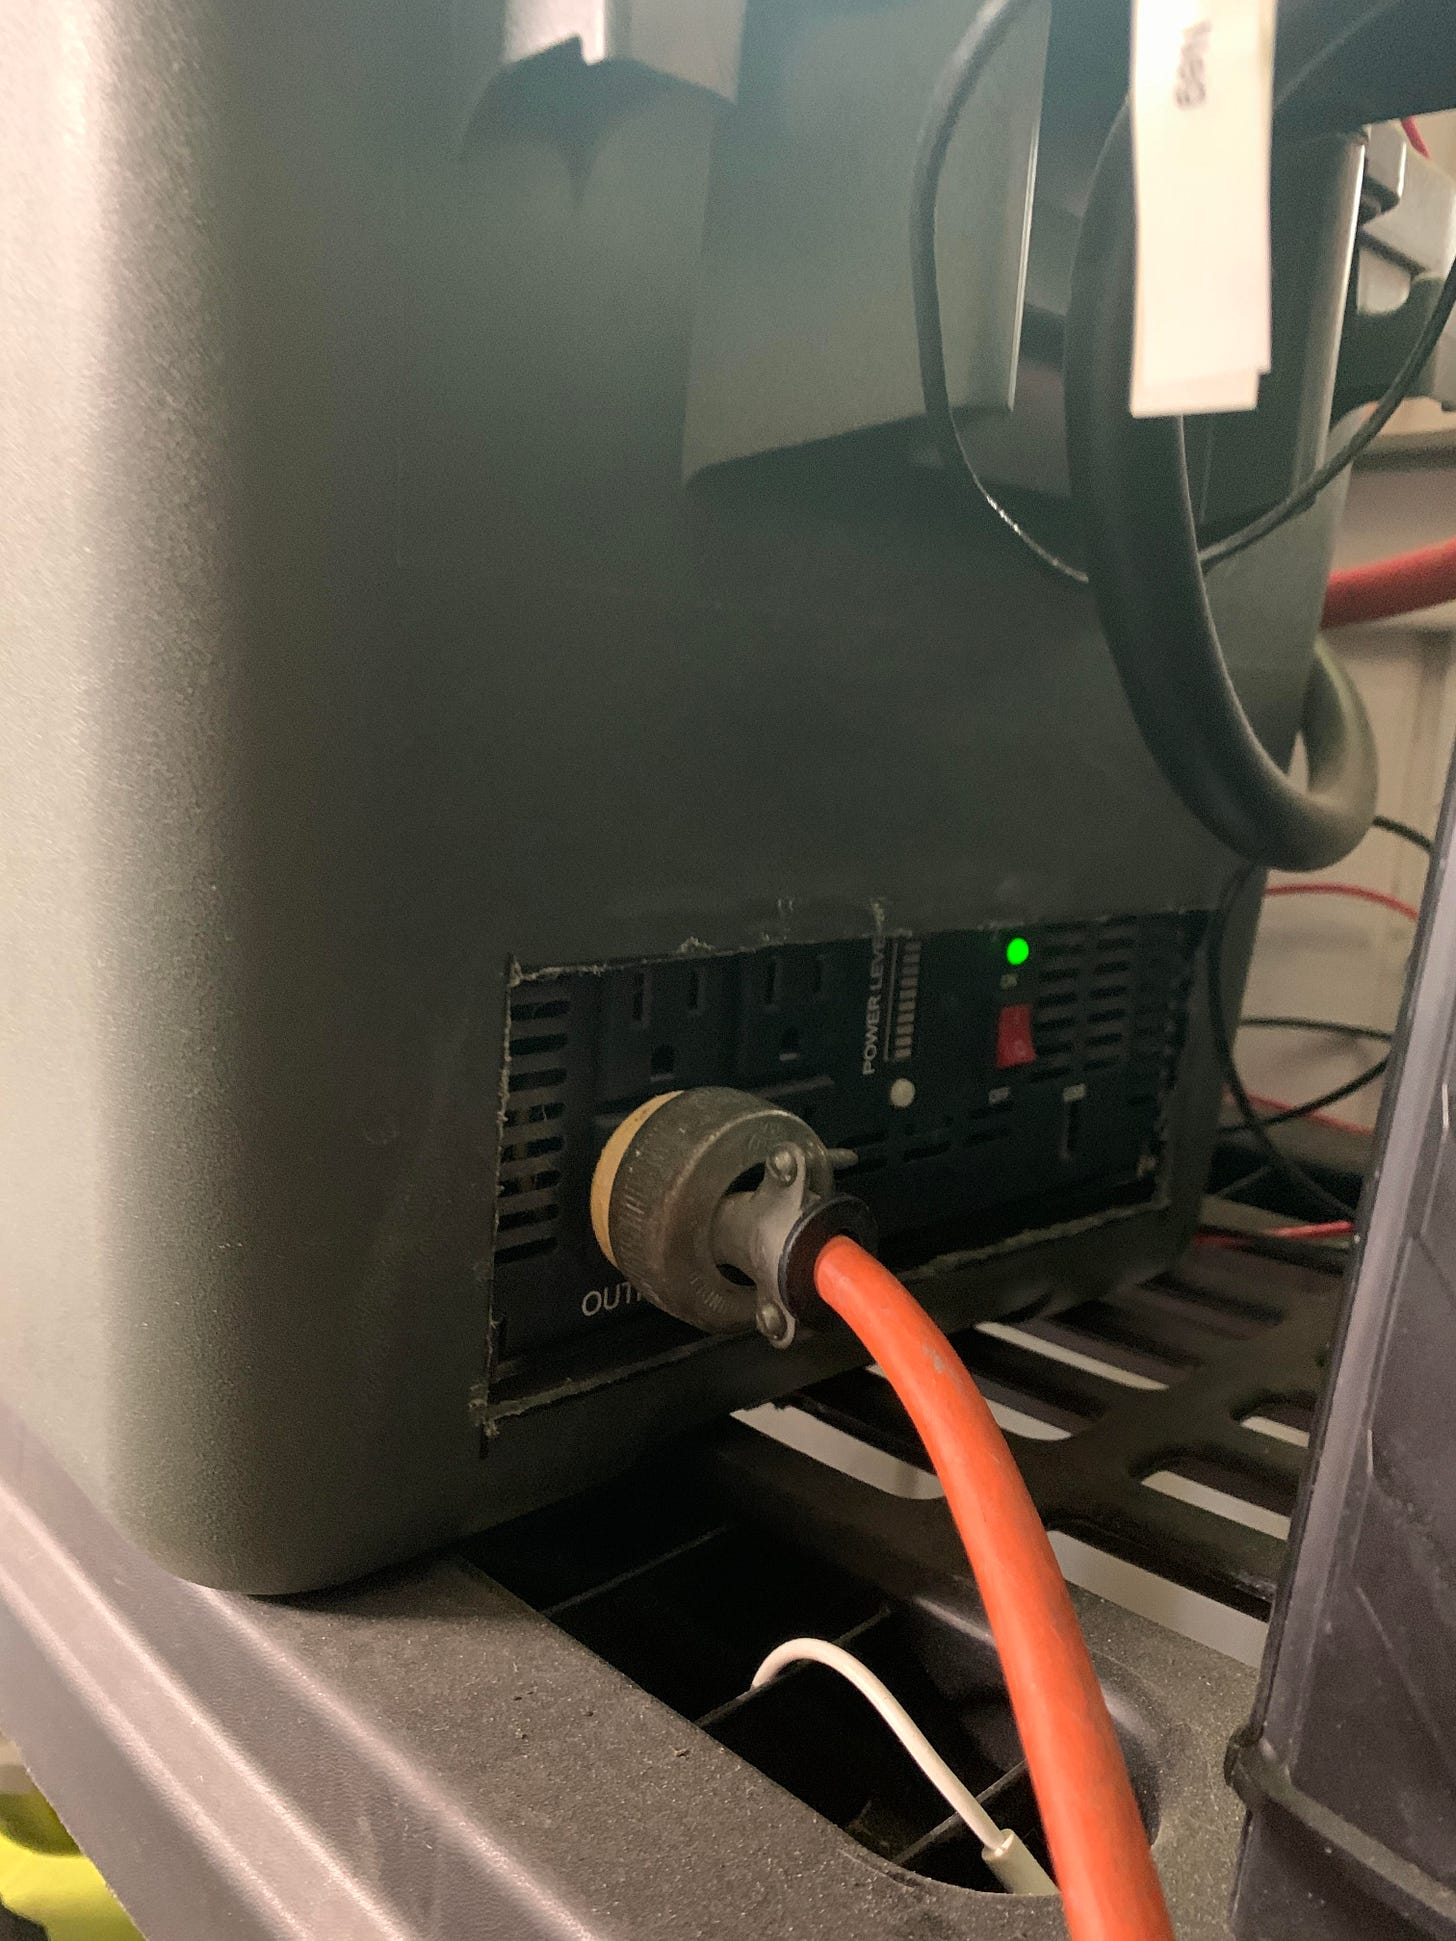
An inverter connects to your battery bank and then you plug in your normal stuff into the inverter.
The back connects to your battery bank, negative to negative; positive to positive.
And there are the ports you plug stuff into with a switch to turn it on.
Hook up your inverter to your battery bank and set the ground by screwing a wire onto the ground knob and grounding it on a different piece of metal. It is pretty simple to use, just be careful when attaching the inverter to the battery bank. There are a wide range of inverters, you can get pretty decent ones for good money. I would go big and get one that seems a little overpowered for what you need it for. Appliances don’t draw even current and can spike. With heaters you need pretty high voltage to work when the heating elements kick on so the inverter needs to be able to handle that peak voltage. I got mine from Harbor Freight. They don’t have the best tools and would recommend maybe spending more money on a decent inverter. I do like Harbor Freight because there is one near me and their return policy is super lax, so I had a defective one and just returned it. You might not have a harbor freight near you so just look into some good inverters. Again this isn't a buyers guide for the best, this is to get the gist of how the whole system works.
Putting it all together
So those are the components you need in general to get started. Obviously, there are some tools you need and supplies like wires to connect everything together. And also the topic of mounting the solar panels. If they aren’t going on a roof where should they go?
Solar Panel mounting with recycled materials
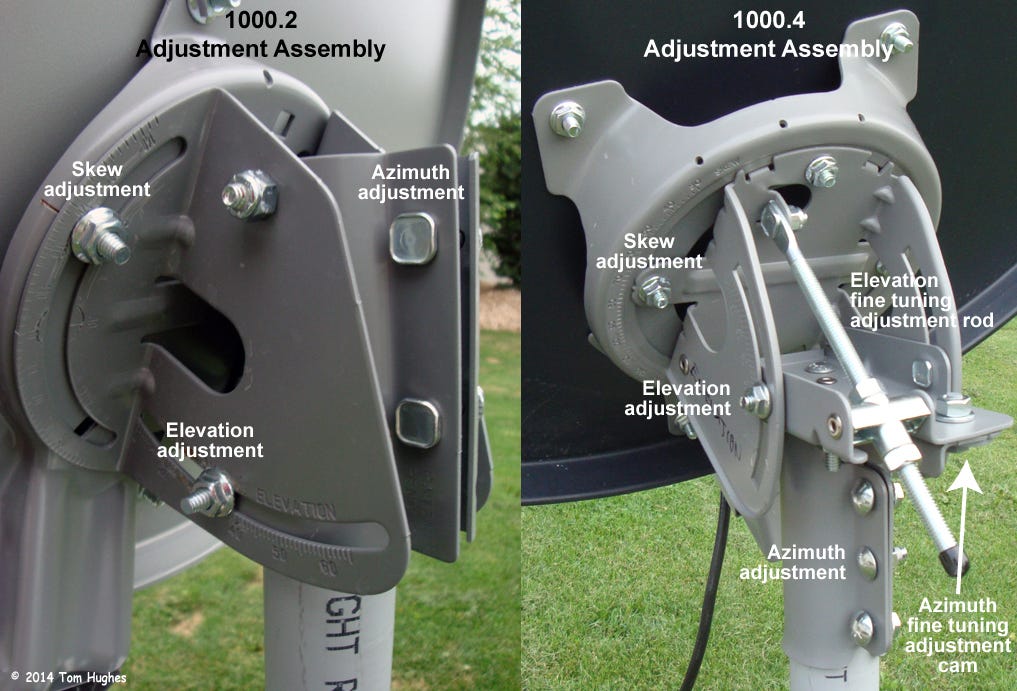
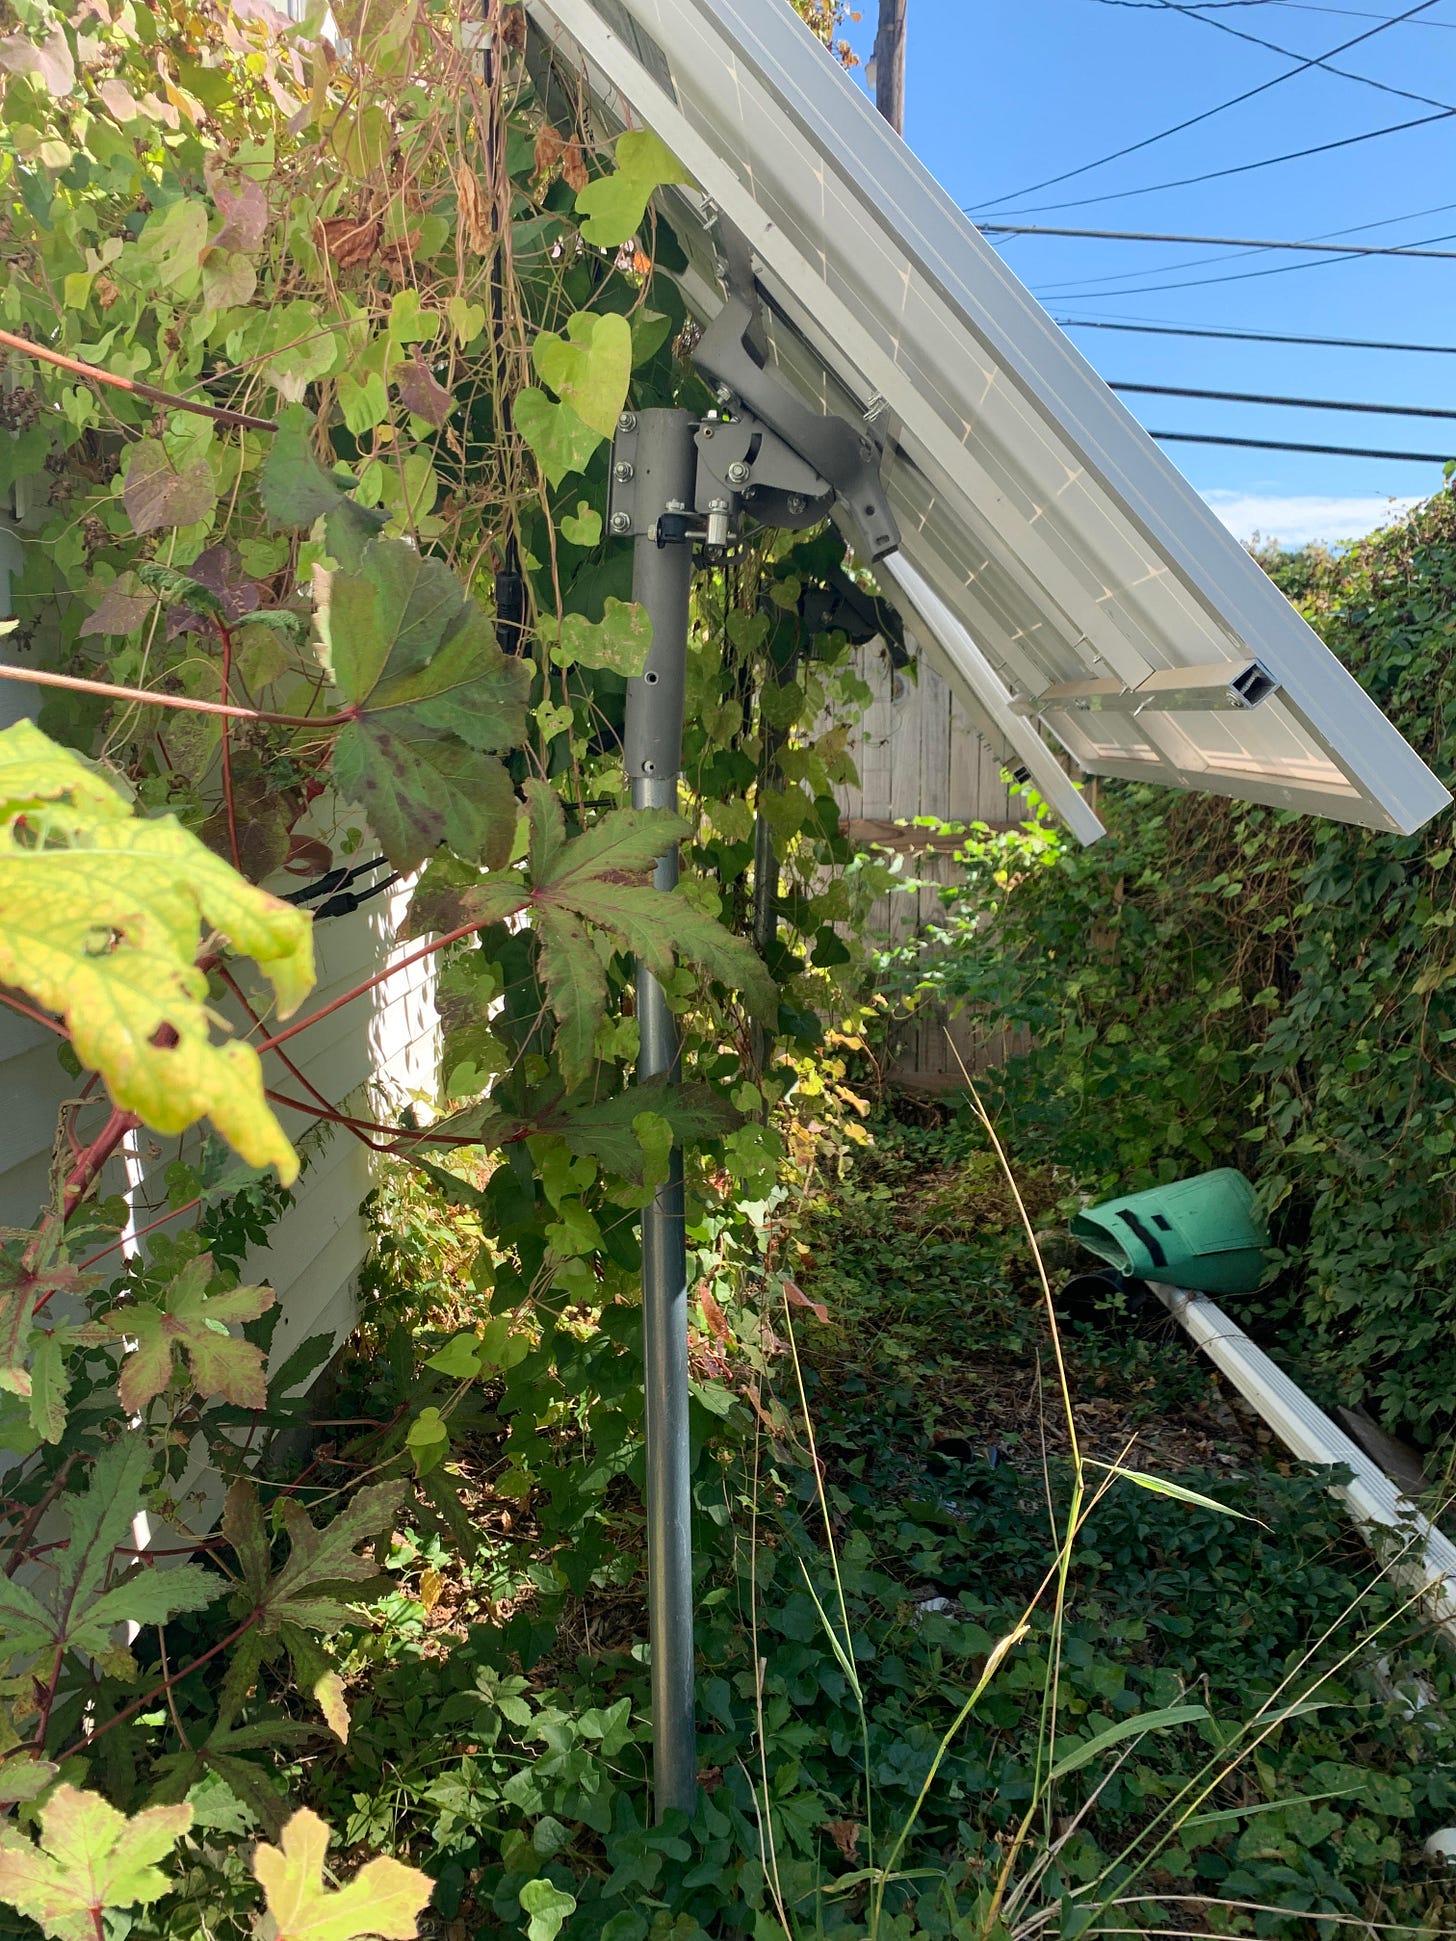
I advise people not to mount DIY solar install on their roofs. Mainly because it is dangerous without proper training, it requires some extensive knowledge about drilling into roofs without causing leaks and it is stationary. With all of that I have my solar panels mounted on recycled satellite dish mounts.
Why?
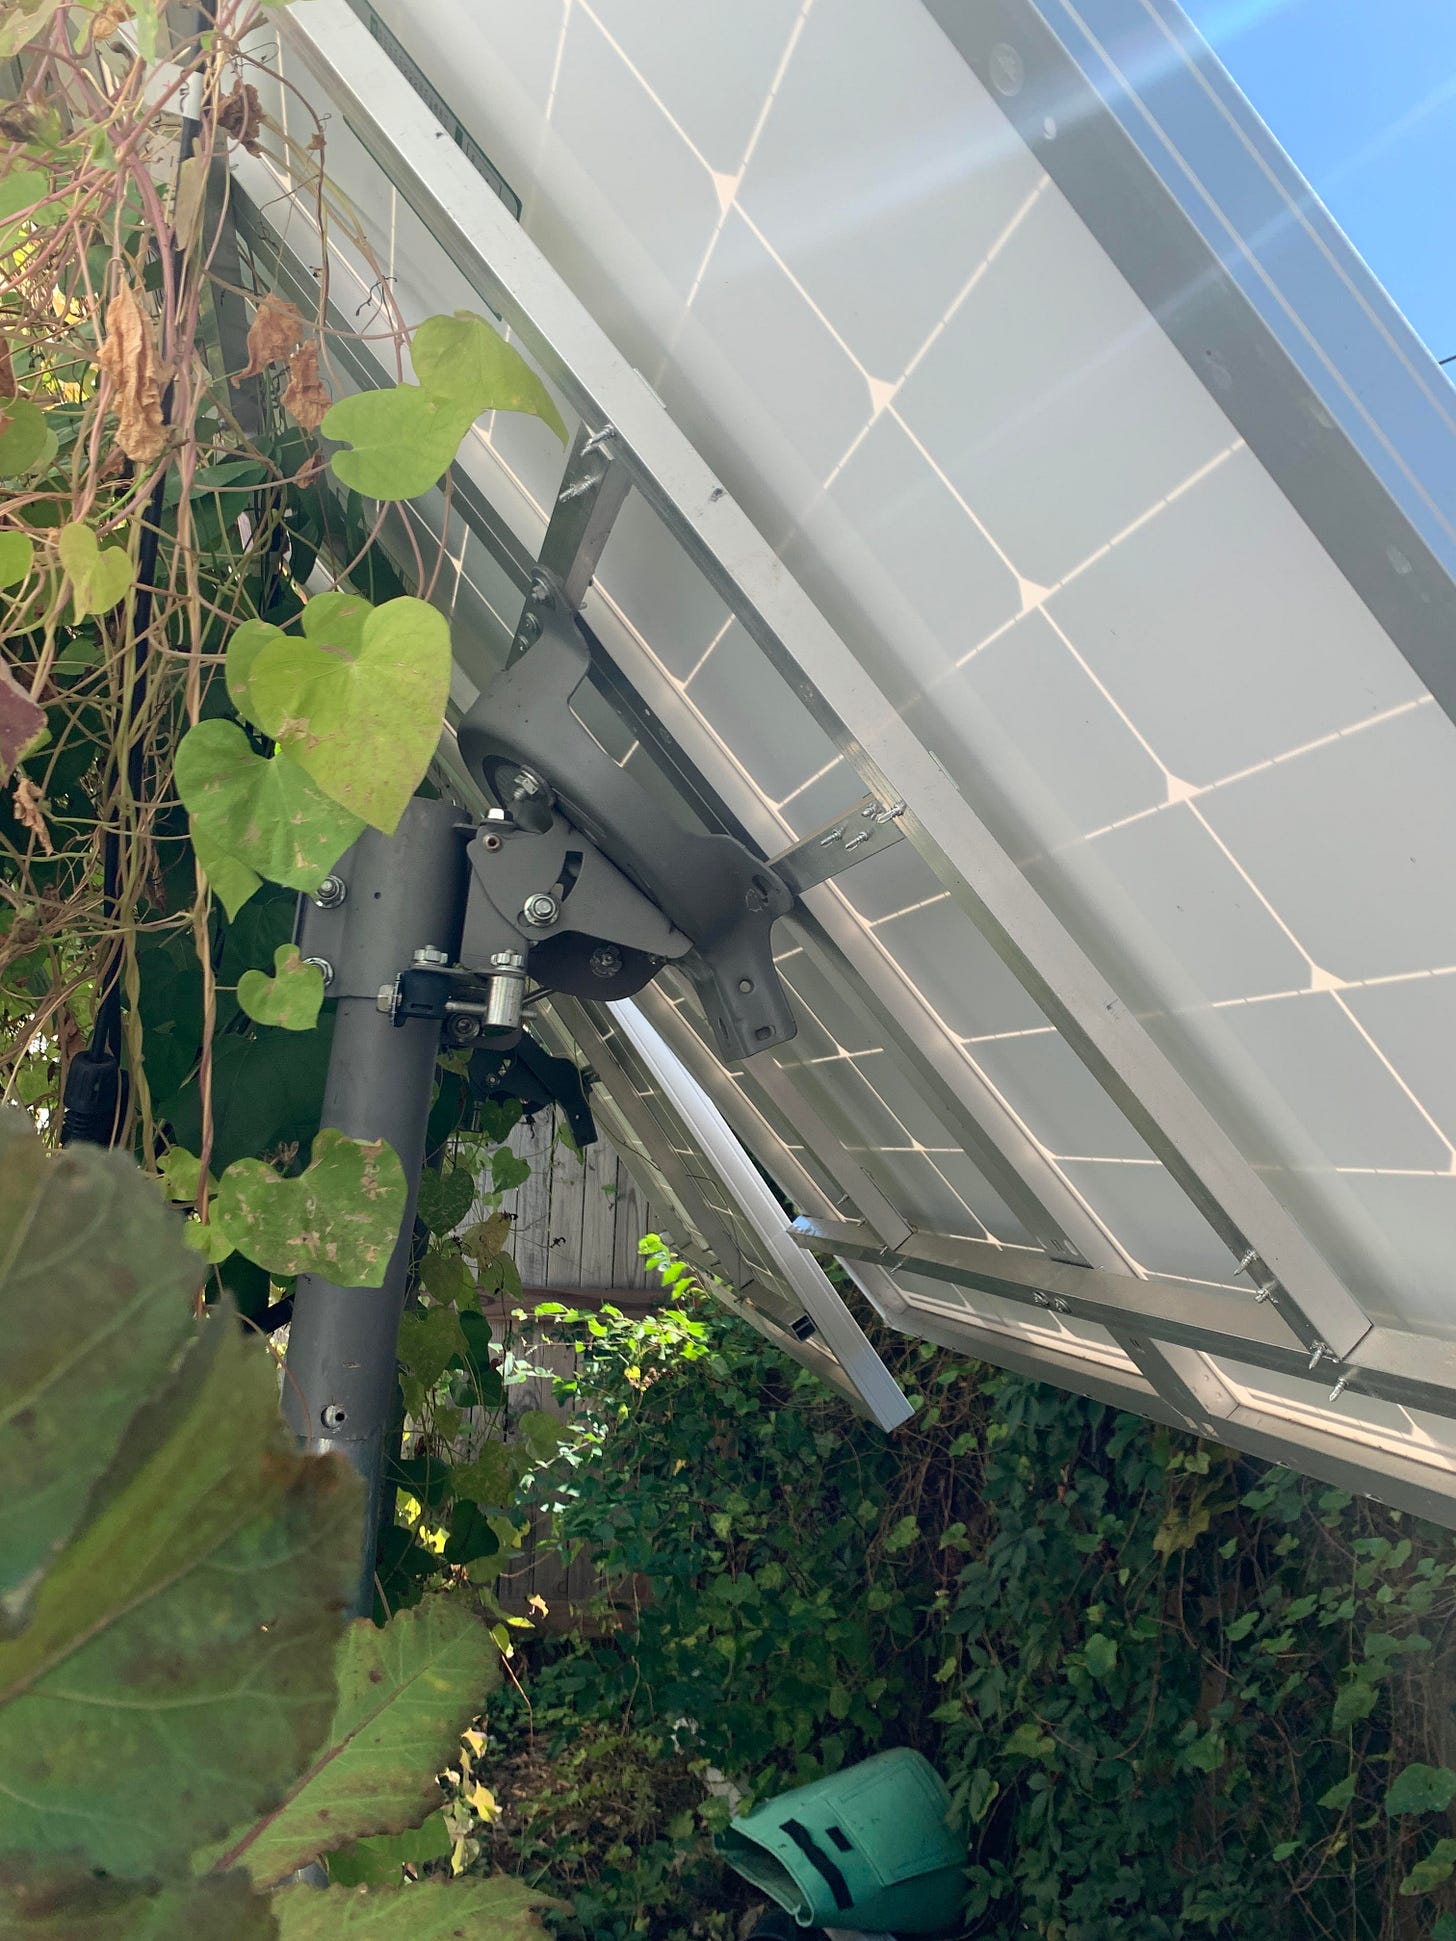
They are free, I find them all the time being thrown away when someone gets rid of their satellite dish. They are made of super-strong metal, and also have a built in tilt mechanism with pretty accurate degrees of movement. So for basically free you can tilt and position of your panels to the perfect angle depending on the season. You can move them around to capture more light in other areas, you can also mount them to the roof of a car and use them on the move (depends on construction). They are semi mobile too so if I know there will be a bad hail storm I just take them inside to minimize damage.
The collar the mount sits in also fits really well on your standard metal fence post. So you could get all the mounting materials from someone redoing their house. Then you dig a hole and set your metal post in there, and the dish mount will sit on top of the metal pole.
From there, make a frame out of metal, wood, really anything to hold the panel on the mount where the satellite dish used to be.
I screwed in the satellite dish collar so it wouldn’t move around or have any chance to blow off. The pole is in a bucket buried in the ground with concrete and is at the perfect height to clear the fence and allow full sunlight from the south.
I made a frame to connect the panels with aluminum but you can also use wood or reclaimed wood though there are concerns on strength and weatherproofing it. I went with aluminum because I don’t have a welder but I also wanted to be able to dismount the panels and mount them to my Jeep if I wanted solar power on the move. Get the frame and attach it directly to the frame of the solar panels. You could also just tilt them against a wall or mount them flat and skip all this. Depends on what you want to do and your circumstances. I could have just put them on a table and leaned them against a wall. Whatever works, you just want them in direct sunlight, preferably pointing south.
Wiring and connecting the dots
Some other stuff you will need to connect it all together:
MC4 connectors to wire the PV panels to the charge controller
10 gauge wire for the entire project. But I recommend using 8 gauge wire, it can handle more voltage if things go bad. Costs more but it safer.
A splitter if you have multiple panels in your system
Wire strippers/cutters
Inverter cables to connect the inverter and the batteries
Optional but the proper way is to add a 30A breaker between each connection and a shut off switch. That way if anything shorts it won’t damage anything. This is rare, but a good safety mechanism to have. I will create an updated guide that includes breakers and cut off switches, but this is a simple and dirty tutorial.
Almost all solar panels have an MC4 connector. You can buy kits that have the correct tools to handle them.
For wires in this example those 400 Watts of solar are more than likely going to be using a peak amperage of 30 Amps. So use 10 gauge wire to safely accommodate the amount of power flowing through. Get a roll of red and a roll of black 10 gauge stranded wire. Add the proper MC4 connector to one end and leave the other end bare. DO NOT CONNECT THE PANELS UNTIL THE VERY END!
Once you have your connectors crimped and stripped, route them from your solar site to where the system will be housed. Insert them into your charge controller where the solar symbol is. Again make sure the wires are not plugged into the solar panels when doing this.
Then you are going to connect your batteries together in parallel. Ideally, you should use really thick inverter cables. Though in a pinch you could use car jumper cables but I would not recommend that. Negative to negative, positive to positive. Be aware when connecting batteries, they may spark. This is normal, just make sure not to touch the 2 leads together.
So you have your battery bank connected, and the solar leads in the charge controller but not connected to your panels. Next add the stripped end of some alligator clips into the slots under the battery symbol. Red is positive, Black is negative. Make sure the alligator clips are not connected to the battery yet.
Strip the ends off a pre-purchased set or you can use a sacrificial car jumper cable set. Add it to the charge controller and crimp it in place. So far the system looks like this:
You want to get everything in order separately. So you want to connect your MC4 connectors in the solar spot and your battery leads to your charge controller. And have your battery bank fully connected. Next you connect your alligator leads from the charge controller to your battery bank. Negative to negative, positive to positive.
Next attach your inverter to the battery bank. Again negative to negative, positive to positive. Follow the instructions on your inverter and make sure to connect a wire to the ground connector and ground it to something metal that wont shock someone if it shorts.
Ok, so now your charge controller will have powered on and you can actually test out drawing power from your inverter by plugging a light or a fan into your inverter and double-check all your connections are good. Then for the last thing, connecting your panels to charge everything up.
First connect your solar panels to a splitter depending on how many panels you have. negative to negative, positive to positive
Then you are ready to double check your connections, make sure all your MC4 connections are in the right place then connect your splitters to your charge controller MC4 connectors.
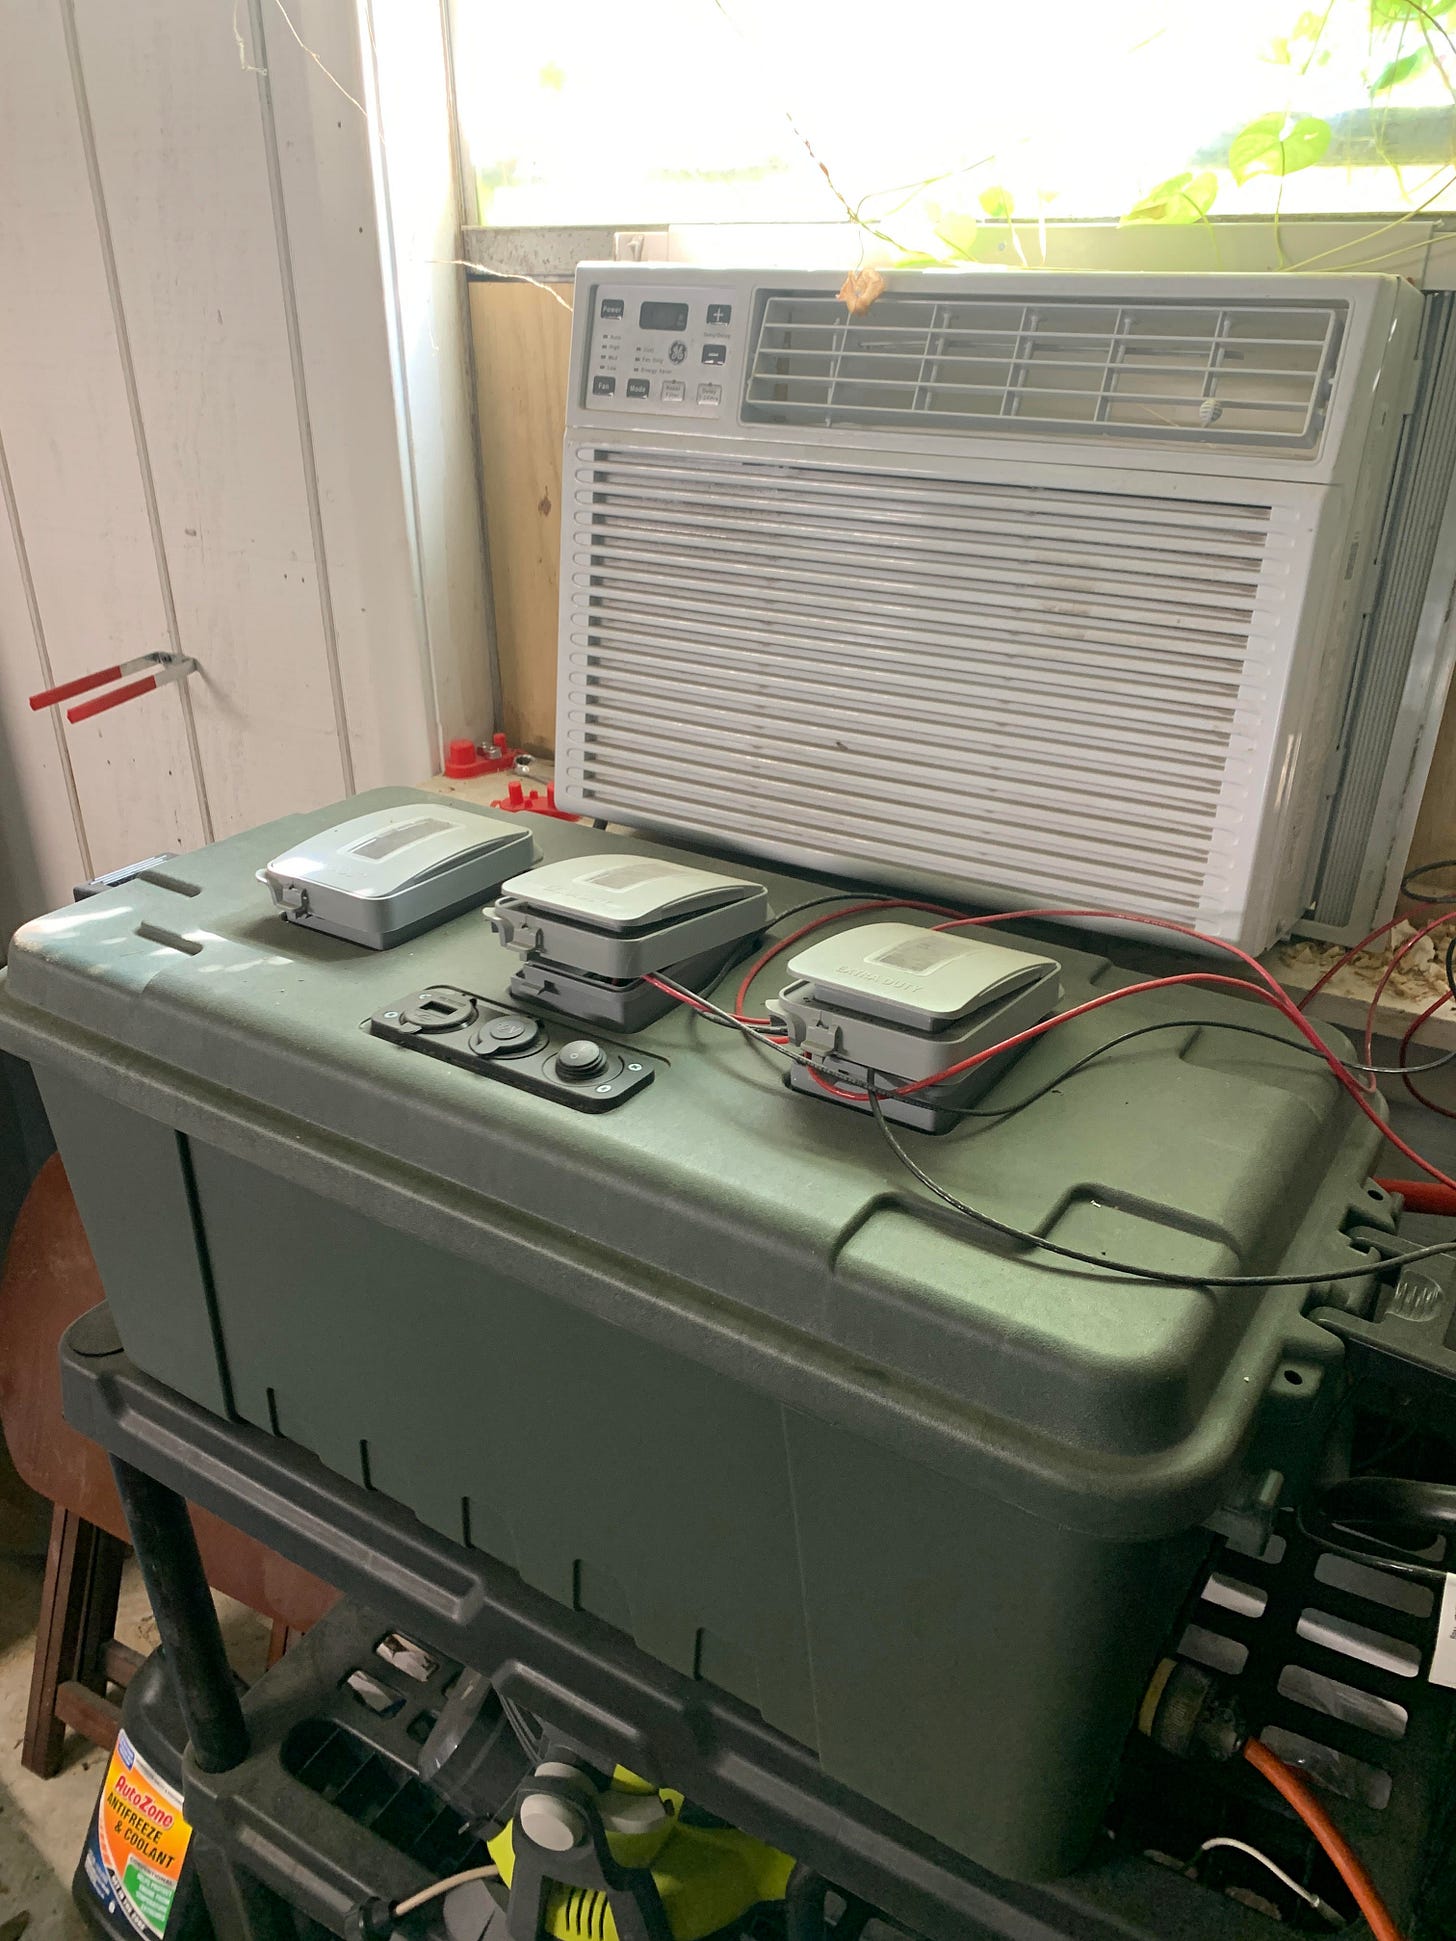
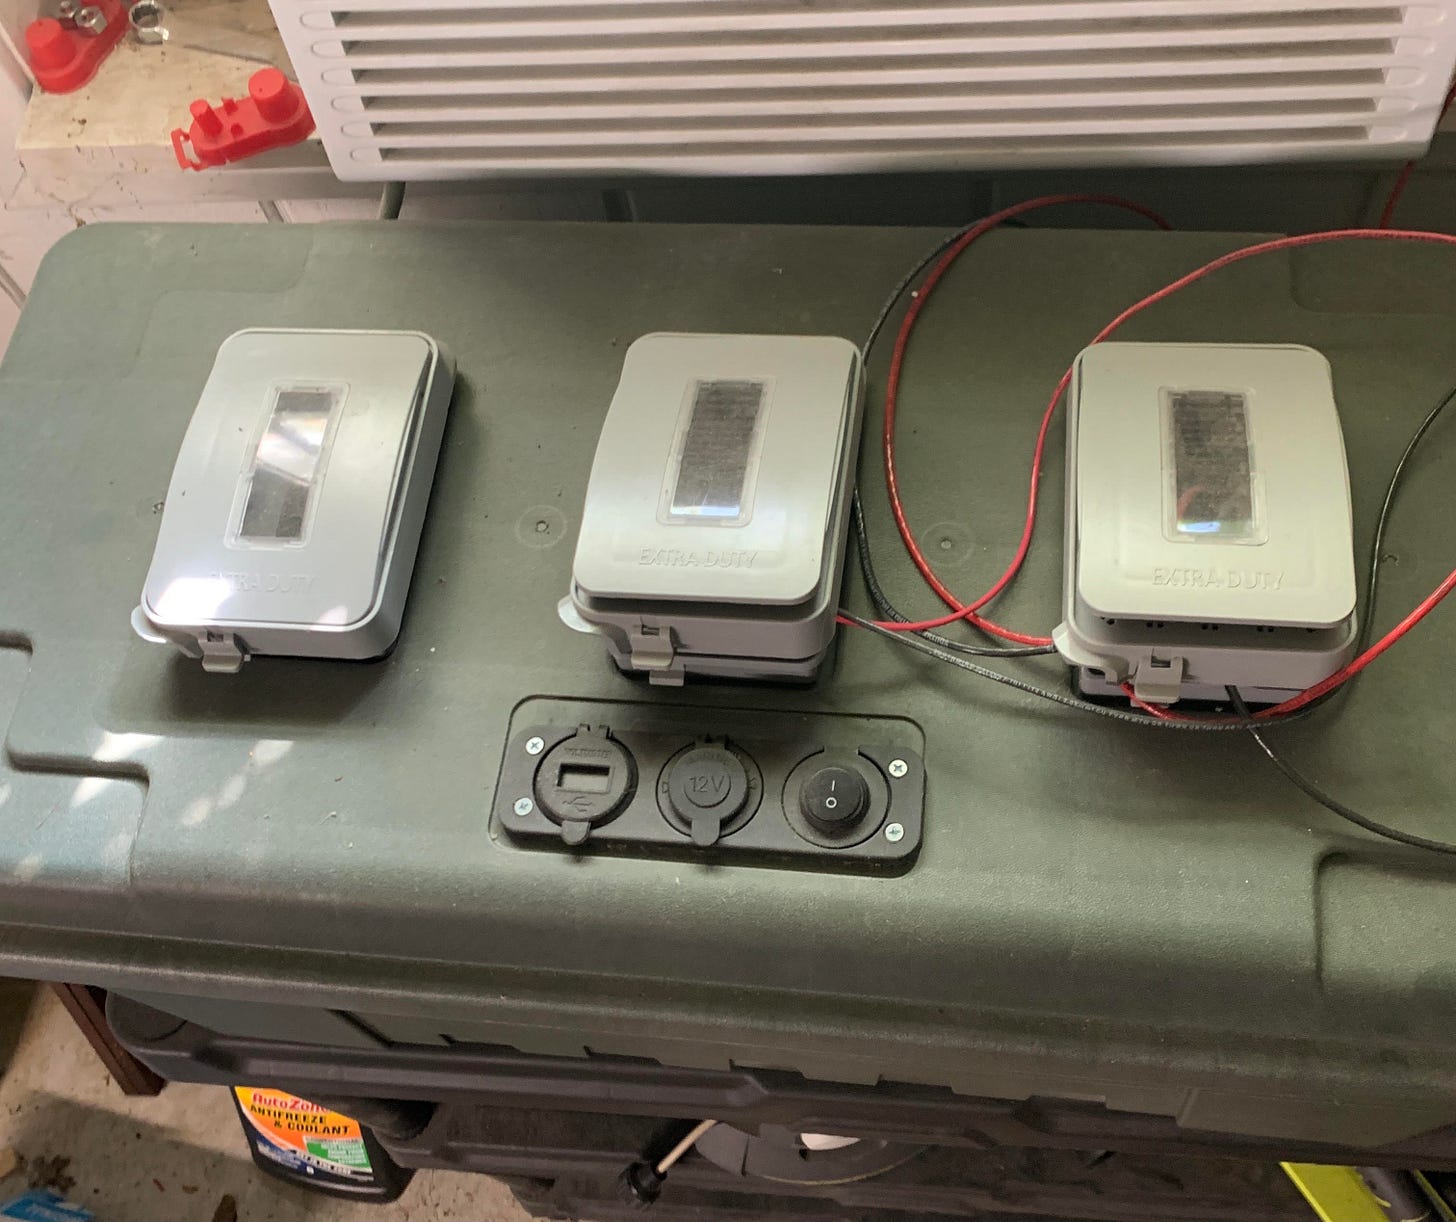
There we go! Pretty cool! You can optionally put your charge controller and inverter in a portable box (with ventilation). I made a housing for my stuff in this portable case and wired up a connector for 12-volt items and USB ports. That 12-volt power strip thing just connects straight to the battery bank and doesn’t need an inverter since it’s 12-volt DC power.
Cost considerations:
This is for 4 100 watt solar panels, a pretty decent charge controller, inverter and 2 105 Amp hour batteries.
Solar Panels $320
Charge controller $130
Inverter $320
Batteries $200
Supplies $100
Plus tools for cutting stuff and for making the frames but I won’t include that in the total.
So hovering at around $1,070. Compared to a prebuilt system, lets look whats different for $500 less.
DIY system has 400 watts of solar, so 4 times more electrical generation than an off the shelf Jackery kit.
2,520 Watt hours with 2 105AH batteries compared to 1000 Watt hours of the Jackery
Beefier load capabilities and higher spike voltage handling (depends on the inverter)
Modular parts and easily scalable and repairable
Cons of a DIY system.
Super heavy compared to the Jackery
Less user friendly for most people to stumble on and operate
Potentially dangerous because you are working with exposed wires
Requires assembly and time to build the system
Does not use a Lithium-Ion battery
There are pros and cons of making a system like this. And again this is not a complete guide on how to do this. I left a lot of details out. This is more so a guide to understand the core components and understand how a normal person with minimal skills can set something like this up. There is so much information to learn about solar and every step has hours of videos and reading you can do. I am by far no means an expert at any of this, but hopefully this inspires you to make your own thing or hell, just to know kinda how something like a Jackery or solar generator works.
This isn’t a solution to everything, it’s small scale and meant to lower your electricity costs and give you some emergency power. But having the ability to live without the grid, live outside state control, and potentially save you or your family’s life in an emergency, well that’s worth it all.


